![]()
2024年最新の有効なCKAテスト解答とLinux Foundation試験PDF問題を試そう
無料Linux Foundation CKA試験問題と解答トレーニングを提供していますJPNTest
Linux Foundation Certified Kubernetes Administrator(CKA)プログラムは、Kubernetesと協力する専門家のスキルと知識を検証する認定試験です。 Kubernetesは、コンテナ化されたアプリケーションの展開、スケーリング、および管理を自動化するオープンソースコンテナオーケストレーションプラットフォームです。 CKAプログラムは、Kubernetesクラスターをインストール、構成、および管理する個人が能力をテストするように設計されています。
質問 # 21
Score: 4%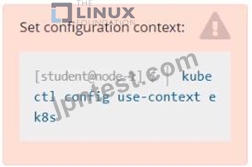
Task
Set the node named ek8s-node-1 as unavailable and reschedule all the pods running on it.
正解:
解説:
See the solution below.
Explanation
SOLUTION:
[student@node-1] > ssh ek8s
kubectl cordon ek8s-node-1
kubectl drain ek8s-node-1 --delete-local-data --ignore-daemonsets --force
質問 # 22
Create an nginx pod with container Port 80 and it should only receive traffic only it checks the endpoint / on port 80 and verify and delete the pod.
- A. kubectl run nginx --image=nginx --restart=Never --port=80 --
dry-run -o yaml > nginx-pod.yaml
// add the readinessProbe section and create
vim nginx-pod.yaml
apiVersion: v1
kind: Pod
metadata:
labels:
run: nginx
name: nginx
spec:
containers:
- image: nginx
name: nginx
ports:
- containerPort: 80
readinessProbe:
httpGet:
path: /
port: 80
restartPolicy: Never
kubectl apply -f nginx-pod.yaml
// verify
kubectl describe pod nginx | grep -i readiness
kubectl delete po nginx - B. kubectl run nginx --image=nginx --restart=Never --port=80 --
dry-run -o yaml > nginx-pod.yaml
// add the readinessProbe section and create
vim nginx-pod.yaml
run: nginx
name: nginx
spec:
containers:
- image: nginx
name: nginx
ports:
- containerPort: 60
readinessProbe:
httpGet:
path: /
port: 60
restartPolicy: Never
kubectl apply -f nginx-pod.yaml
// verify
kubectl describe pod nginx | grep -i readiness
kubectl delete po nginx
正解:A
質問 # 23
Create a pod that echo "hello world" and then exists. Have the pod deleted automatically when it's completed
正解:
解説:
See the solution below.
Explanation
kubectl run busybox --image=busybox -it --rm --restart=Never --
/bin/sh -c 'echo hello world'
kubectl get po # You shouldn't see pod with the name "busybox"
質問 # 24
Score: 4%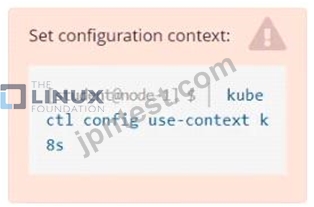
Task
Scale the deployment presentation to 6 pods.
正解:
解説:
Solution:
kubectl get deployment
kubectl scale deployment.apps/presentation --replicas=6
質問 # 25
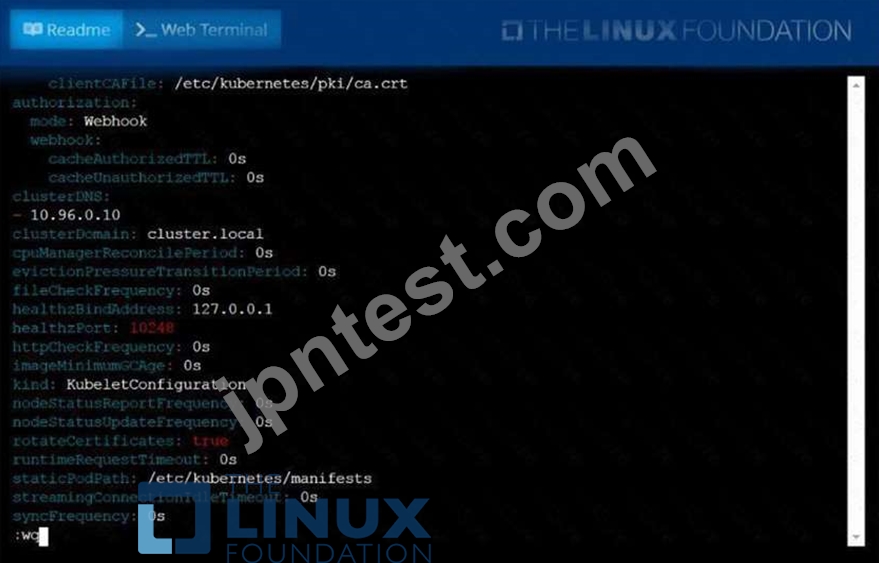
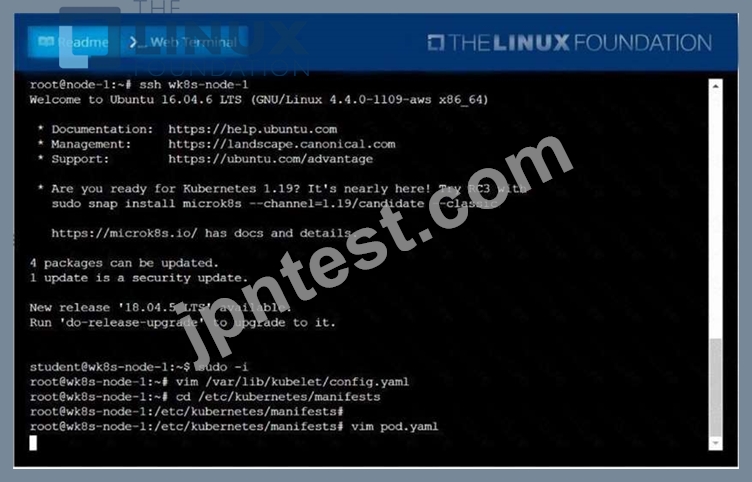
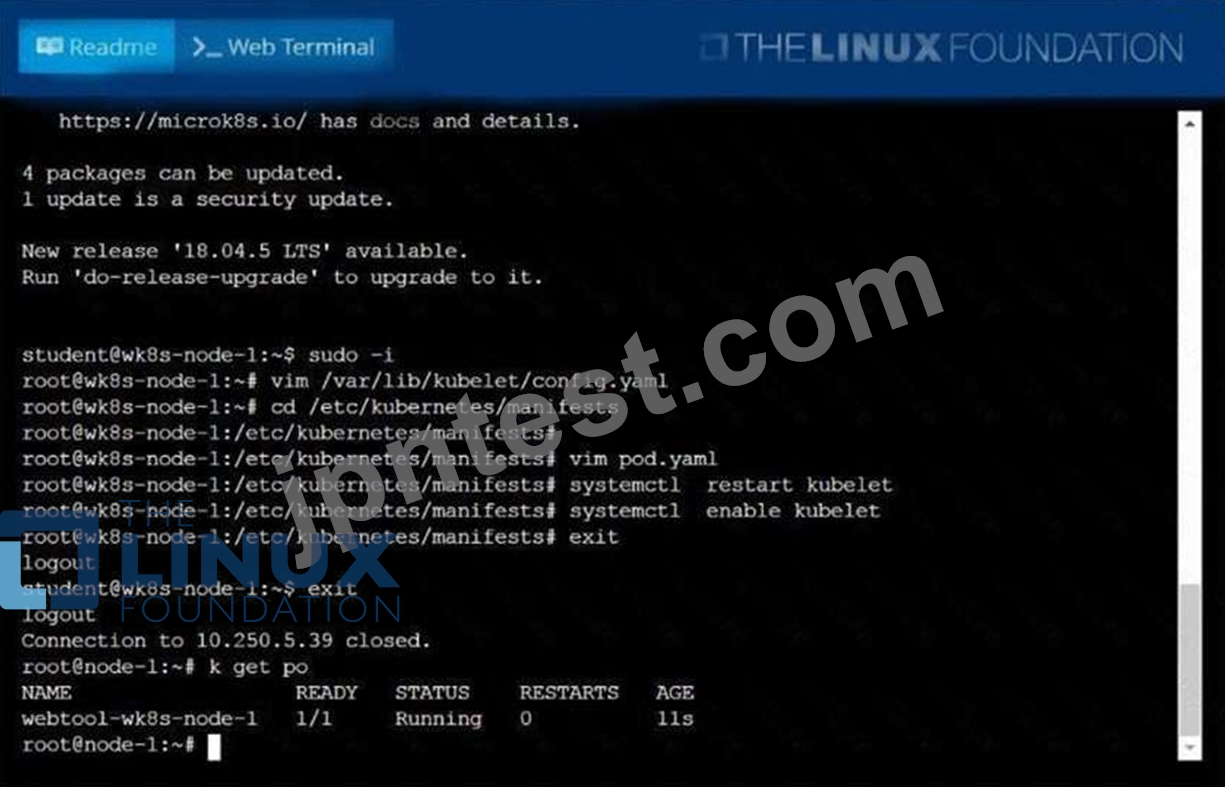
Configure the kubelet systemd- managed service, on the node labelled with name=wk8s-node-1, to launch a pod containing a single container of Image httpd named webtool automatically. Any spec files required should be placed in the /etc/kubernetes/manifests directory on the node.
You can ssh to the appropriate node using:
[student@node-1] $ ssh wk8s-node-1
You can assume elevated privileges on the node with the following command:
[student@wk8s-node-1] $ | sudo -i
正解:
解説:
See the solution below.
Explanation
solution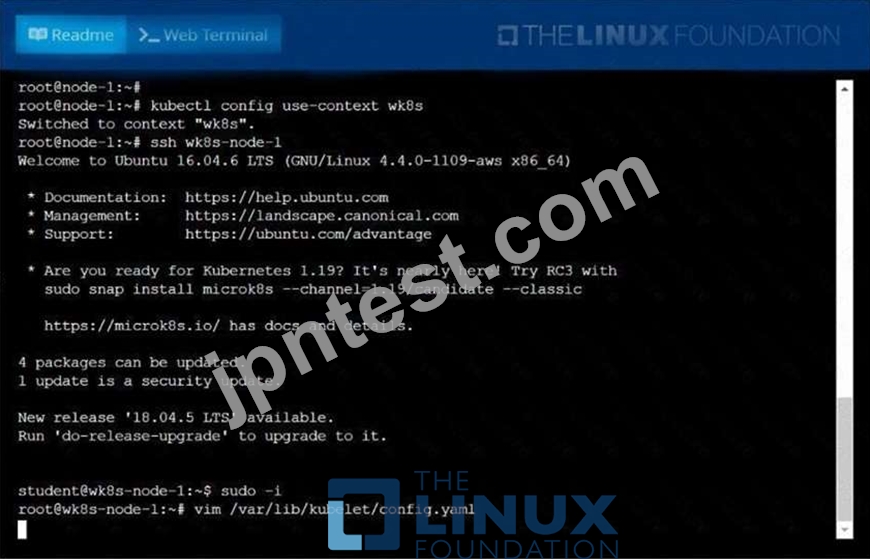

質問 # 26
Get the DNS records for the service and pods for the deployment redis and the put the value in /tmp/dnsrecordpod and /tmp/dnsrecord-service
- A. // Get Pod Ip
kubectl get po -o wide
// Get Service Name
kubectl get svc
// Create a temporary pod and execute nslookup command
Note: POD IP format should be a-b-c-d and not a.b.c.d
kubectl run busybox --image=busybox:1.28 --restart=Never -
-rm -it -- nslookup 192-168-0-69.default.pod >
/tmp/dnsrecord-pod
kubectl run busybox1 --image=busybox:1.26 --restart=Never
--rm -it -- nslookup redis-service > /tmp/dnsrecordservice
//Verify
cat /tmp/dnsrecord-pod
Server: 10.2.8.10
Address 1: 10.2.0.10 kube-dns.kube system.svc.cluster.local Name: 192-168-0-69.default.pod Address 1: 192.168.0.69 192-166-0-69.redis service.default.svc.cluster.local cat /tmp/dnsrecord-pod Server: 10.2.0.10 Address 1: 10.2.0.10 kube-dns.kube system.svc.cluster.local Name: 192-168-0-69.default.pod Address 1: 192.168.0.69 192-168-0-69.redis service.default.svc.cluster.local - B. // Get Pod Ip
kubectl get po -o wide
// Get Service Name
kubectl get svc
// Create a temporary pod and execute nslookup command
Note: POD IP format should be a-b-c-d and not a.b.c.d
kubectl run busybox --image=busybox:1.28 --restart=Never -
-rm -it -- nslookup 192-168-0-69.default.pod >
/tmp/dnsrecord-pod
kubectl run busybox1 --image=busybox:1.28 --restart=Never
--rm -it -- nslookup redis-service > /tmp/dnsrecordservice
//Verify
cat /tmp/dnsrecord-pod
Server: 10.2.0.10
Address 1: 10.2.0.10 kube-dns.kube system.svc.cluster.local Name: 192-168-0-69.default.pod Address 1: 192.168.0.69 192-168-0-69.redis service.default.svc.cluster.local cat /tmp/dnsrecord-pod Server: 10.2.0.10 Address 1: 10.2.0.10 kube-dns.kube system.svc.cluster.local Name: 192-168-0-69.default.pod Address 1: 192.168.0.69 192-168-0-69.redis service.default.svc.cluster.local
正解:B
質問 # 27
Create a pod with image nginx called nginx and allow traffic on port 80
正解:
解説:
See the solution below.
Explanation
kubectlrun nginx --image=nginx --restart=Never --port=80
質問 # 28
Create a deployment spec file that will:
Launch 7 replicas of the nginx Image with the labelapp_runtime_stage=dev deployment name: kual00201 Save a copy of this spec file to /opt/KUAL00201/spec_deployment.yaml (or /opt/KUAL00201/spec_deployment.json).
When you are done, clean up (delete) any new Kubernetes API object that you produced during this task.
正解:
解説:
See the solution below.
Explanation
solution
F:\Work\Data Entry Work\Data Entry\20200827\CKA\10 B.JPG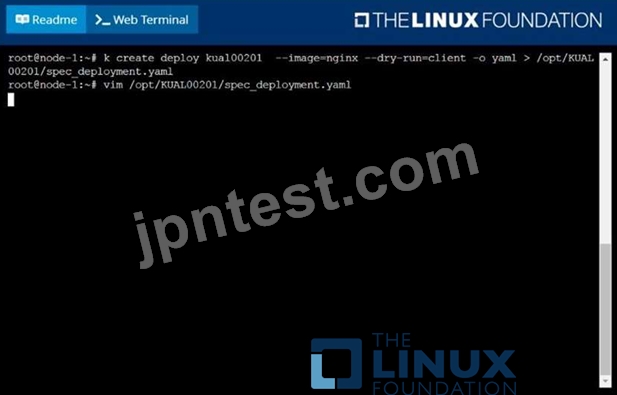
F:\Work\Data Entry Work\Data Entry\20200827\CKA\10 C.JPG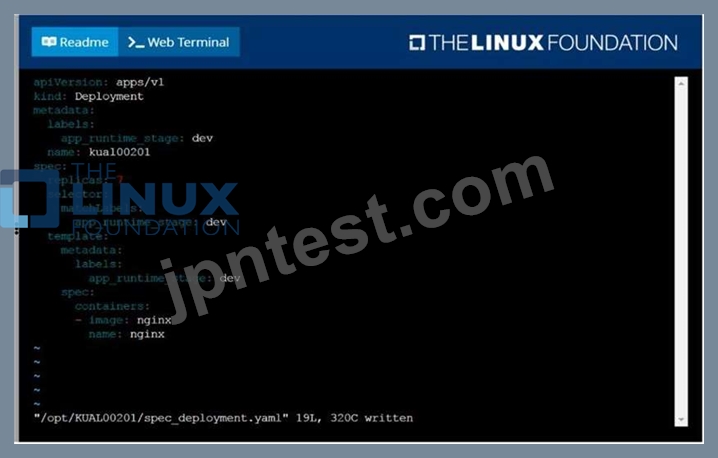
質問 # 29
Score:7%
Context
An existing Pod needs to be integrated into the Kubernetes built-in logging architecture (e. g. kubectl logs).
Adding a streaming sidecar container is a good and common way to accomplish this requirement.
Task
Add a sidecar container named sidecar, using the busybox Image, to the existing Pod big-corp-app. The new sidecar container has to run the following command:
/bin/sh -c tail -n+1 -f /va r/log/big-corp-app.log
Use a Volume, mounted at /var/log, to make the log file big-corp-app.log available to the sidecar container.
正解:
解説:
See the solution below.
Explanation
Solution:
#
kubectl get pod big-corp-app -o yaml
#
apiVersion: v1
kind: Pod
metadata:
name: big-corp-app
spec:
containers:
- name: big-corp-app
image: busybox
args:
- /bin/sh
- -c
- >
i=0;
while true;
do
echo "$(date) INFO $i" >> /var/log/big-corp-app.log;
i=$((i+1));
sleep 1;
done
volumeMounts:
- name: logs
mountPath: /var/log
- name: count-log-1
image: busybox
args: [/bin/sh, -c, 'tail -n+1 -f /var/log/big-corp-app.log']
volumeMounts:
- name: logs
mountPath: /var/log
volumes:
- name: logs
emptyDir: {
}
#
kubectl logs big-corp-app -c count-log-1
質問 # 30
How can an administrator configure the NGFW to automatically quarantine a device using Global Protect?
- A. by adding the device's Host ID to a quarantine list and configure GlobalProtect to prevent users from connecting to the GlobalProtect gateway from a quarantined device.
- B. There is no native auto-quarantine feature so a custom script would need to be leveraged.
- C. by exporting the list of quarantined devices to a pdf or csv file by selecting PDF/CSV at the bottom of the Device Quarantine page and leveraging the appropriate XSOAR playbook.
- D. by using security policies, log forwarding profiles, and log settings.
正解:A
質問 # 31
List all the pods sorted by name
正解:
解説:
kubect1 get pods --sort-by=.metadata.name
質問 # 32
Create a deployment spec file thatwill:
* Launch 7 replicas of thenginxImage with the labelapp_runtime_stage=dev
* deployment name:kual00201
Save a copy of this spec file to/opt/KUAL00201/spec_deployment.yaml
(or/opt/KUAL00201/spec_deployment.json).
When you are done, clean up (delete)any new Kubernetes API object thatyou produced during this task.
正解:
解説:
See the solution below.
Explanation
solution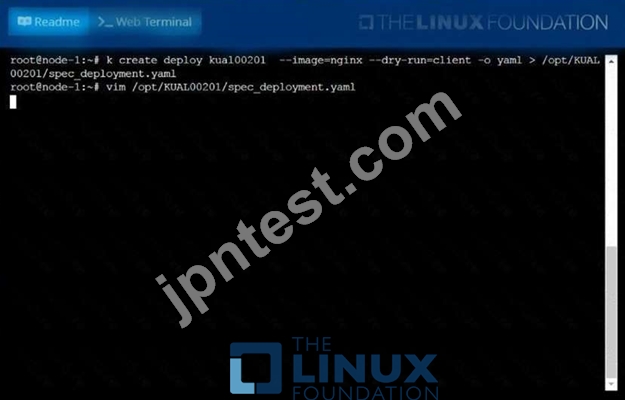

質問 # 33
Create an nginx pod with containerPort 80 and it should check the pod running at endpoint / healthz on port 80 and verify and delete the pod.
- A. kubectl run nginx --image=nginx --restart=Always --port=80 --
dry-run -o yaml > nginx-pod.yaml
// add the livenessProbe section and create
apiVersion: v1
kind: Pod
metadata:
labels:
run: nginx
name: nginx
spec:
containers:
- image: nginx
name: nginx
ports:
- containerPort: 80
livenessProbe:
httpGet:
path: /healthz
port: 80
restartPolicy: Always
kubectl create -f nginx-pod.yaml
// verify
kubectl describe pod nginx | grep -i readiness
kubectl delete po nginx - B. kubectl run nginx --image=nginx --restart=Always --port=80 --
dry-run -o yaml > nginx-pod.yaml
// add the livenessProbe section and create
apiVersion: v1
kind: Pod
metadata:
labels:
containers:
- image: nginx
name: nginx
ports:
- containerPort: 60
livenessProbe:
httpGet:
path: /healthz
port: 60
restartPolicy: Always
kubectl create -f nginx-pod.yaml
// verify
kubectl describe pod nginx | grep -i readiness
kubectl delete po nginx
正解:A
質問 # 34
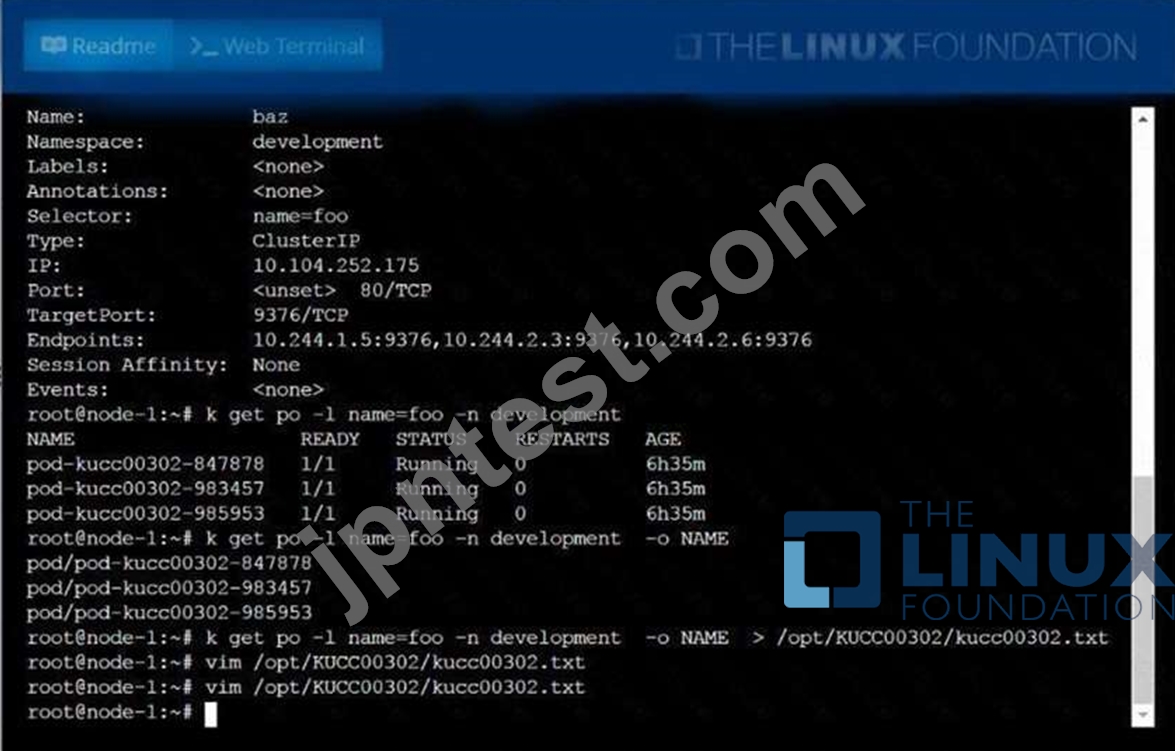
Create a file:
/opt/KUCC00302/kucc00302.txtthatlists all pods that implement servicebazin namespacedevelopment.
The format of the file should be onepod name per line.
正解:
解説:
See the solution below.
Explanation
solution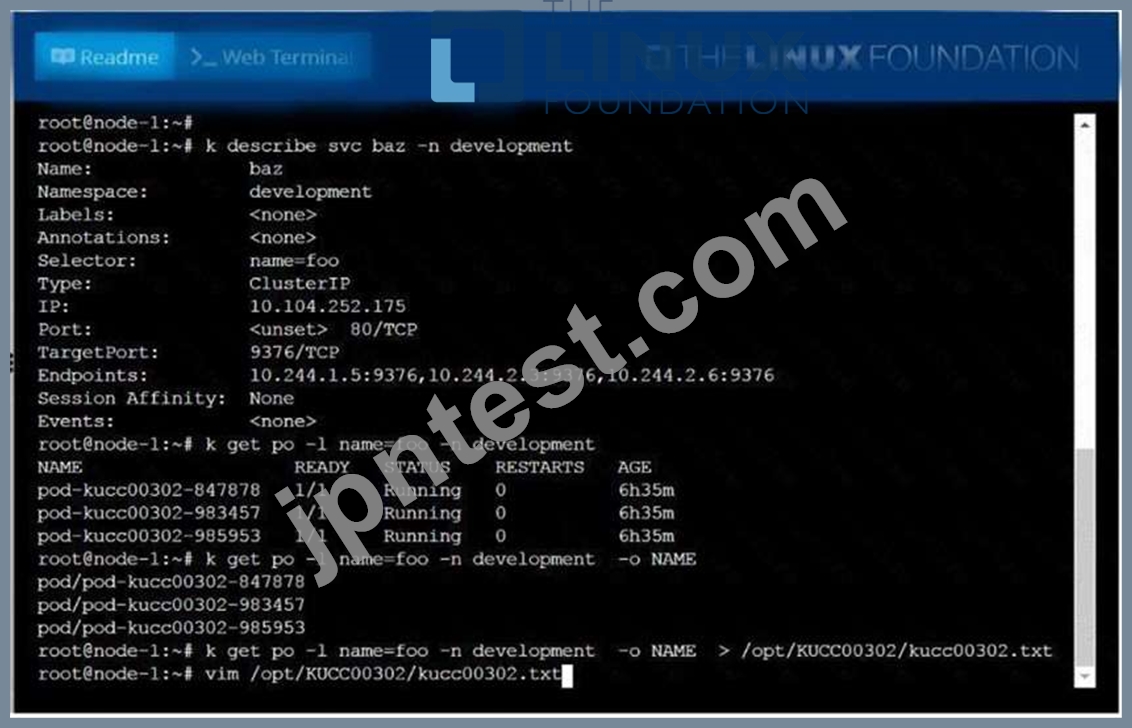

質問 # 35
Check logs of each container that "busyboxpod-{1,2,3}"
- A. kubectl logs busybox -c busybox-container-1
kubectl logs busybox -c busybox-container-2
kubectl logs busybox -c busybox-container-3 - B. kubectl logs busybox -c busybox-container-1
kubectl logs busybox -c busybox-container-3
kubectl logs busybox -c busybox-container-3
正解:A
質問 # 36
Check to see how many worker nodes are ready (not including nodes tainted NoSchedule) and write the number to /opt/KUCC00104/kucc00104.txt.
正解:
解説:
solution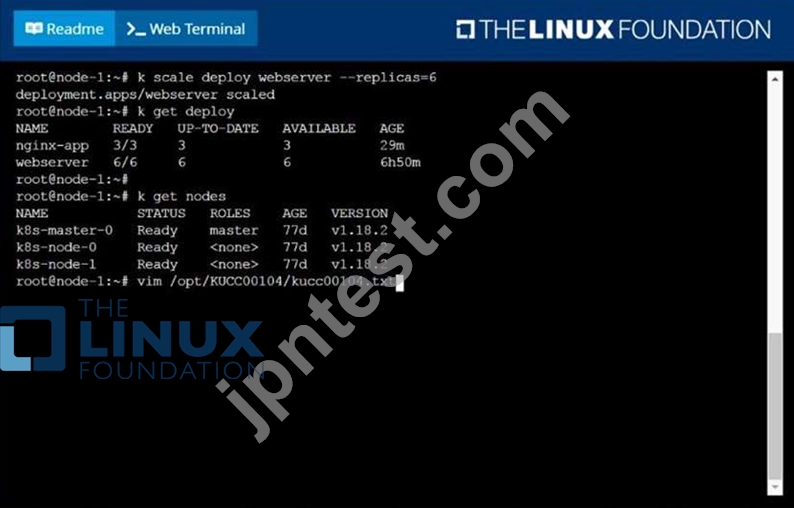

質問 # 37
Create a pod as follows:
Name: non-persistent-redis
container Image: redis
Volume with name: cache-control
Mount path: /data/redis
The pod should launch in the staging be persistent.
正解:
解説:
See the solution below.
Explanation
solution
F:\Work\Data Entry Work\Data Entry\20200827\CKA\13 B.JPG
F:\Work\Data Entry Work\Data Entry\20200827\CKA\13 C.JPG
F:\Work\Data Entry Work\Data Entry\20200827\CKA\13 D.JPG
質問 # 38
Create a busybox pod and add "sleep 3600" command
正解:
解説:
kubectl run busybox --image=busybox --restart=Never -- /bin/sh -c "sleep 3600"
質問 # 39
Perform the following tasks:
Add an init container to hungry-bear defined in spec file
/opt/KUCC00108/pod-spec-KUC
The init container should create /workdir/calm.txt
If /workdir/calm.txt is not
Once the spec file has been definition, the pod should be created
正解:
解説:
See the solution below.
Explanation
solution
F:\Work\Data Entry Work\Data Entry\20200827\CKA\4 B.JPG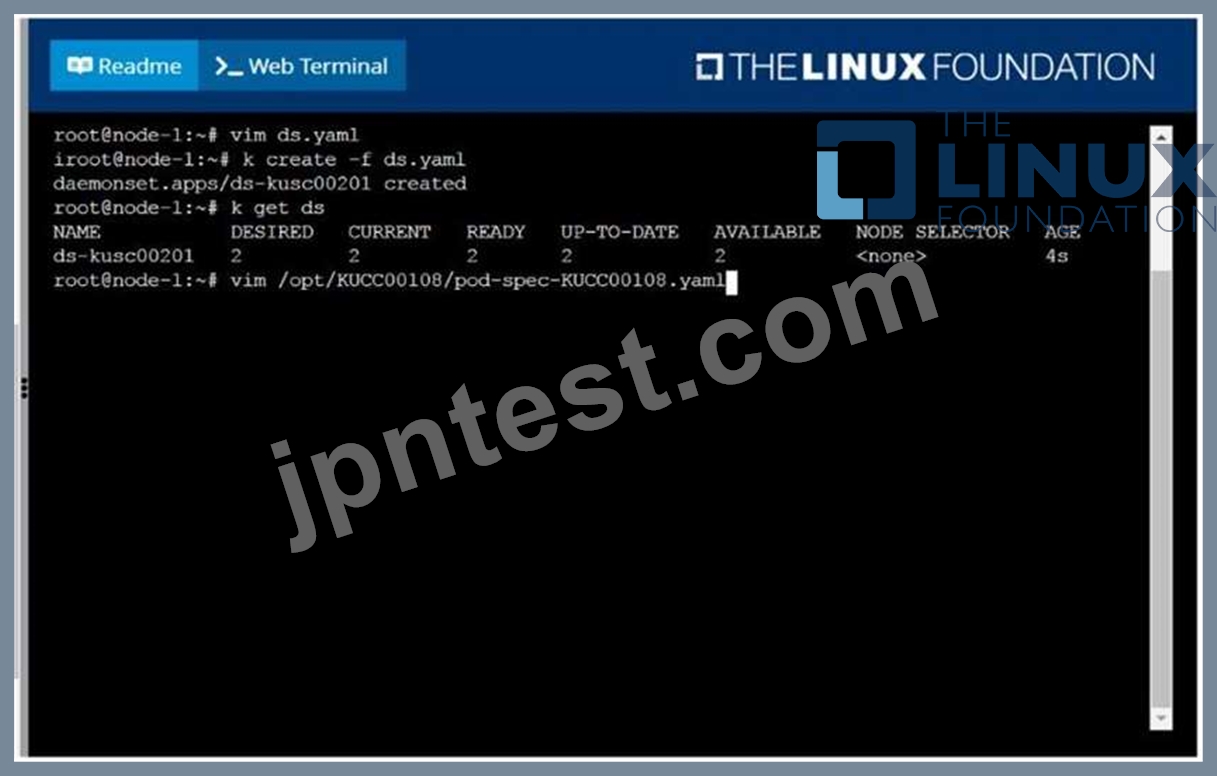
F:\Work\Data Entry Work\Data Entry\20200827\CKA\4 C.JPG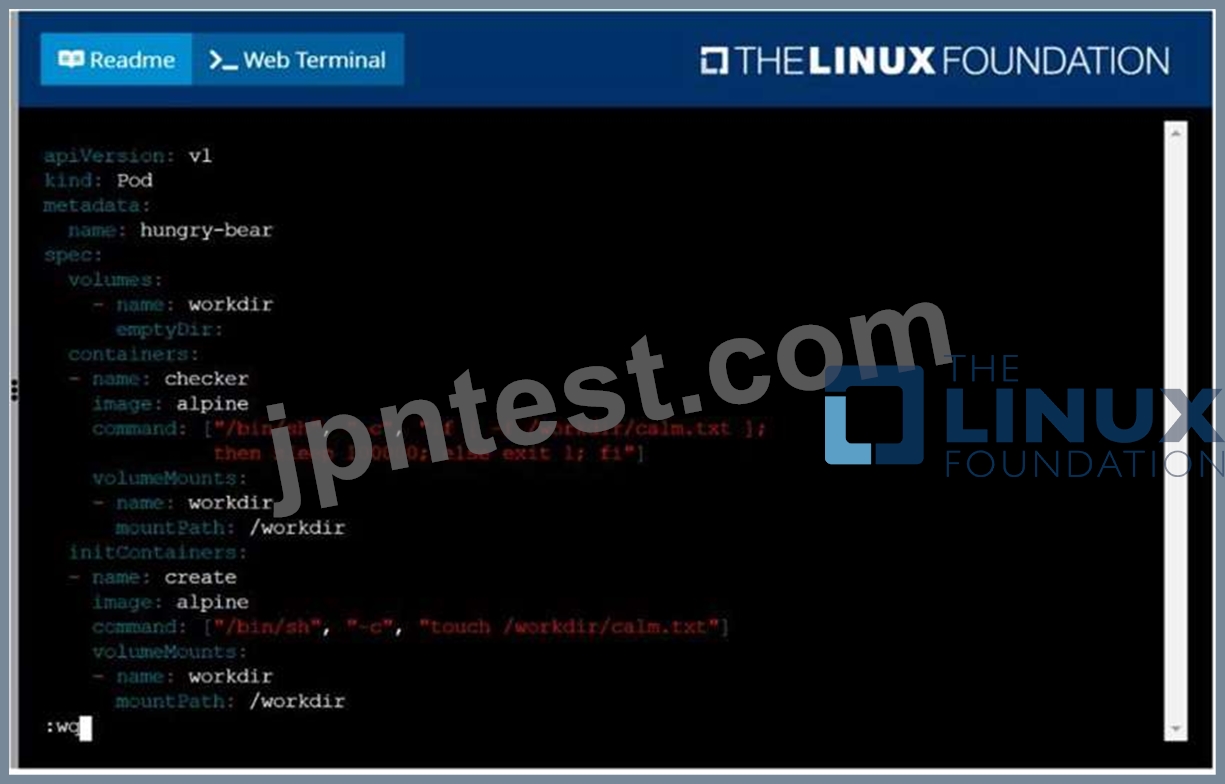
F:\Work\Data Entry Work\Data Entry\20200827\CKA\4 D.JPG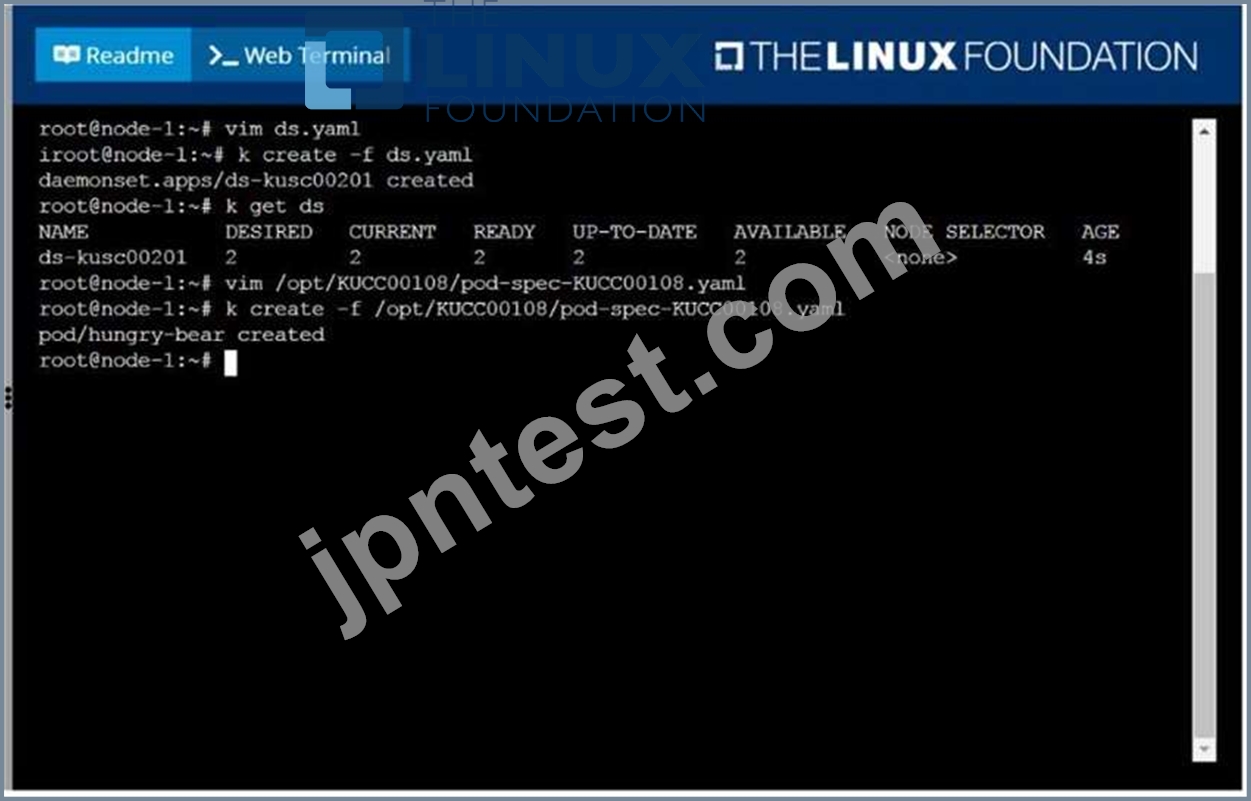
質問 # 40
Create an nginx pod and list the pod with different levels of verbosity
正解:
解説:
See the solution below.
Explanation
// create a pod
kubectl run nginx --image=nginx --restart=Never --port=80
// List the pod with different verbosity
kubectl get po nginx --v=7
kubectl get po nginx --v=8
kubectl get po nginx --v=9
質問 # 41
Change the Image version back to 1.17.1 for the pod you just updated and observe the changes
正解:
解説:
kubectl set image pod/nginx nginx=nginx:1.17.1 kubectl describe po nginx kubectl get po nginx -w # watch it
質問 # 42
Check to see how many worker nodes are ready (not including nodes tainted NoSchedule) and write the number to /opt/KUCC00104/kucc00104.txt.
正解:
解説:
See the solution below.
Explanation
solution
F:\Work\Data Entry Work\Data Entry\20200827\CKA\15 B.JPG
F:\Work\Data Entry Work\Data Entry\20200827\CKA\15 C.JPG
質問 # 43
......
トップクラスLinux Foundation CKAオンライン問題集:https://www.jpntest.com/shiken/CKA-mondaishu